Triple D Pump’s Guide to Proper Float Placement
Float switches are one of the simplest—but most critical—components in a sewer lift station. They control pump operation and alarms by detecting water levels in the wet well. Setting them correctly ensures your pumps turn on and off at the right times, prevents overflows, and protects your equipment from running dry.
At Triple D Pump, we recommend a standard four-float configuration for most municipal and commercial lift stations. Here’s how it works and how to set them.
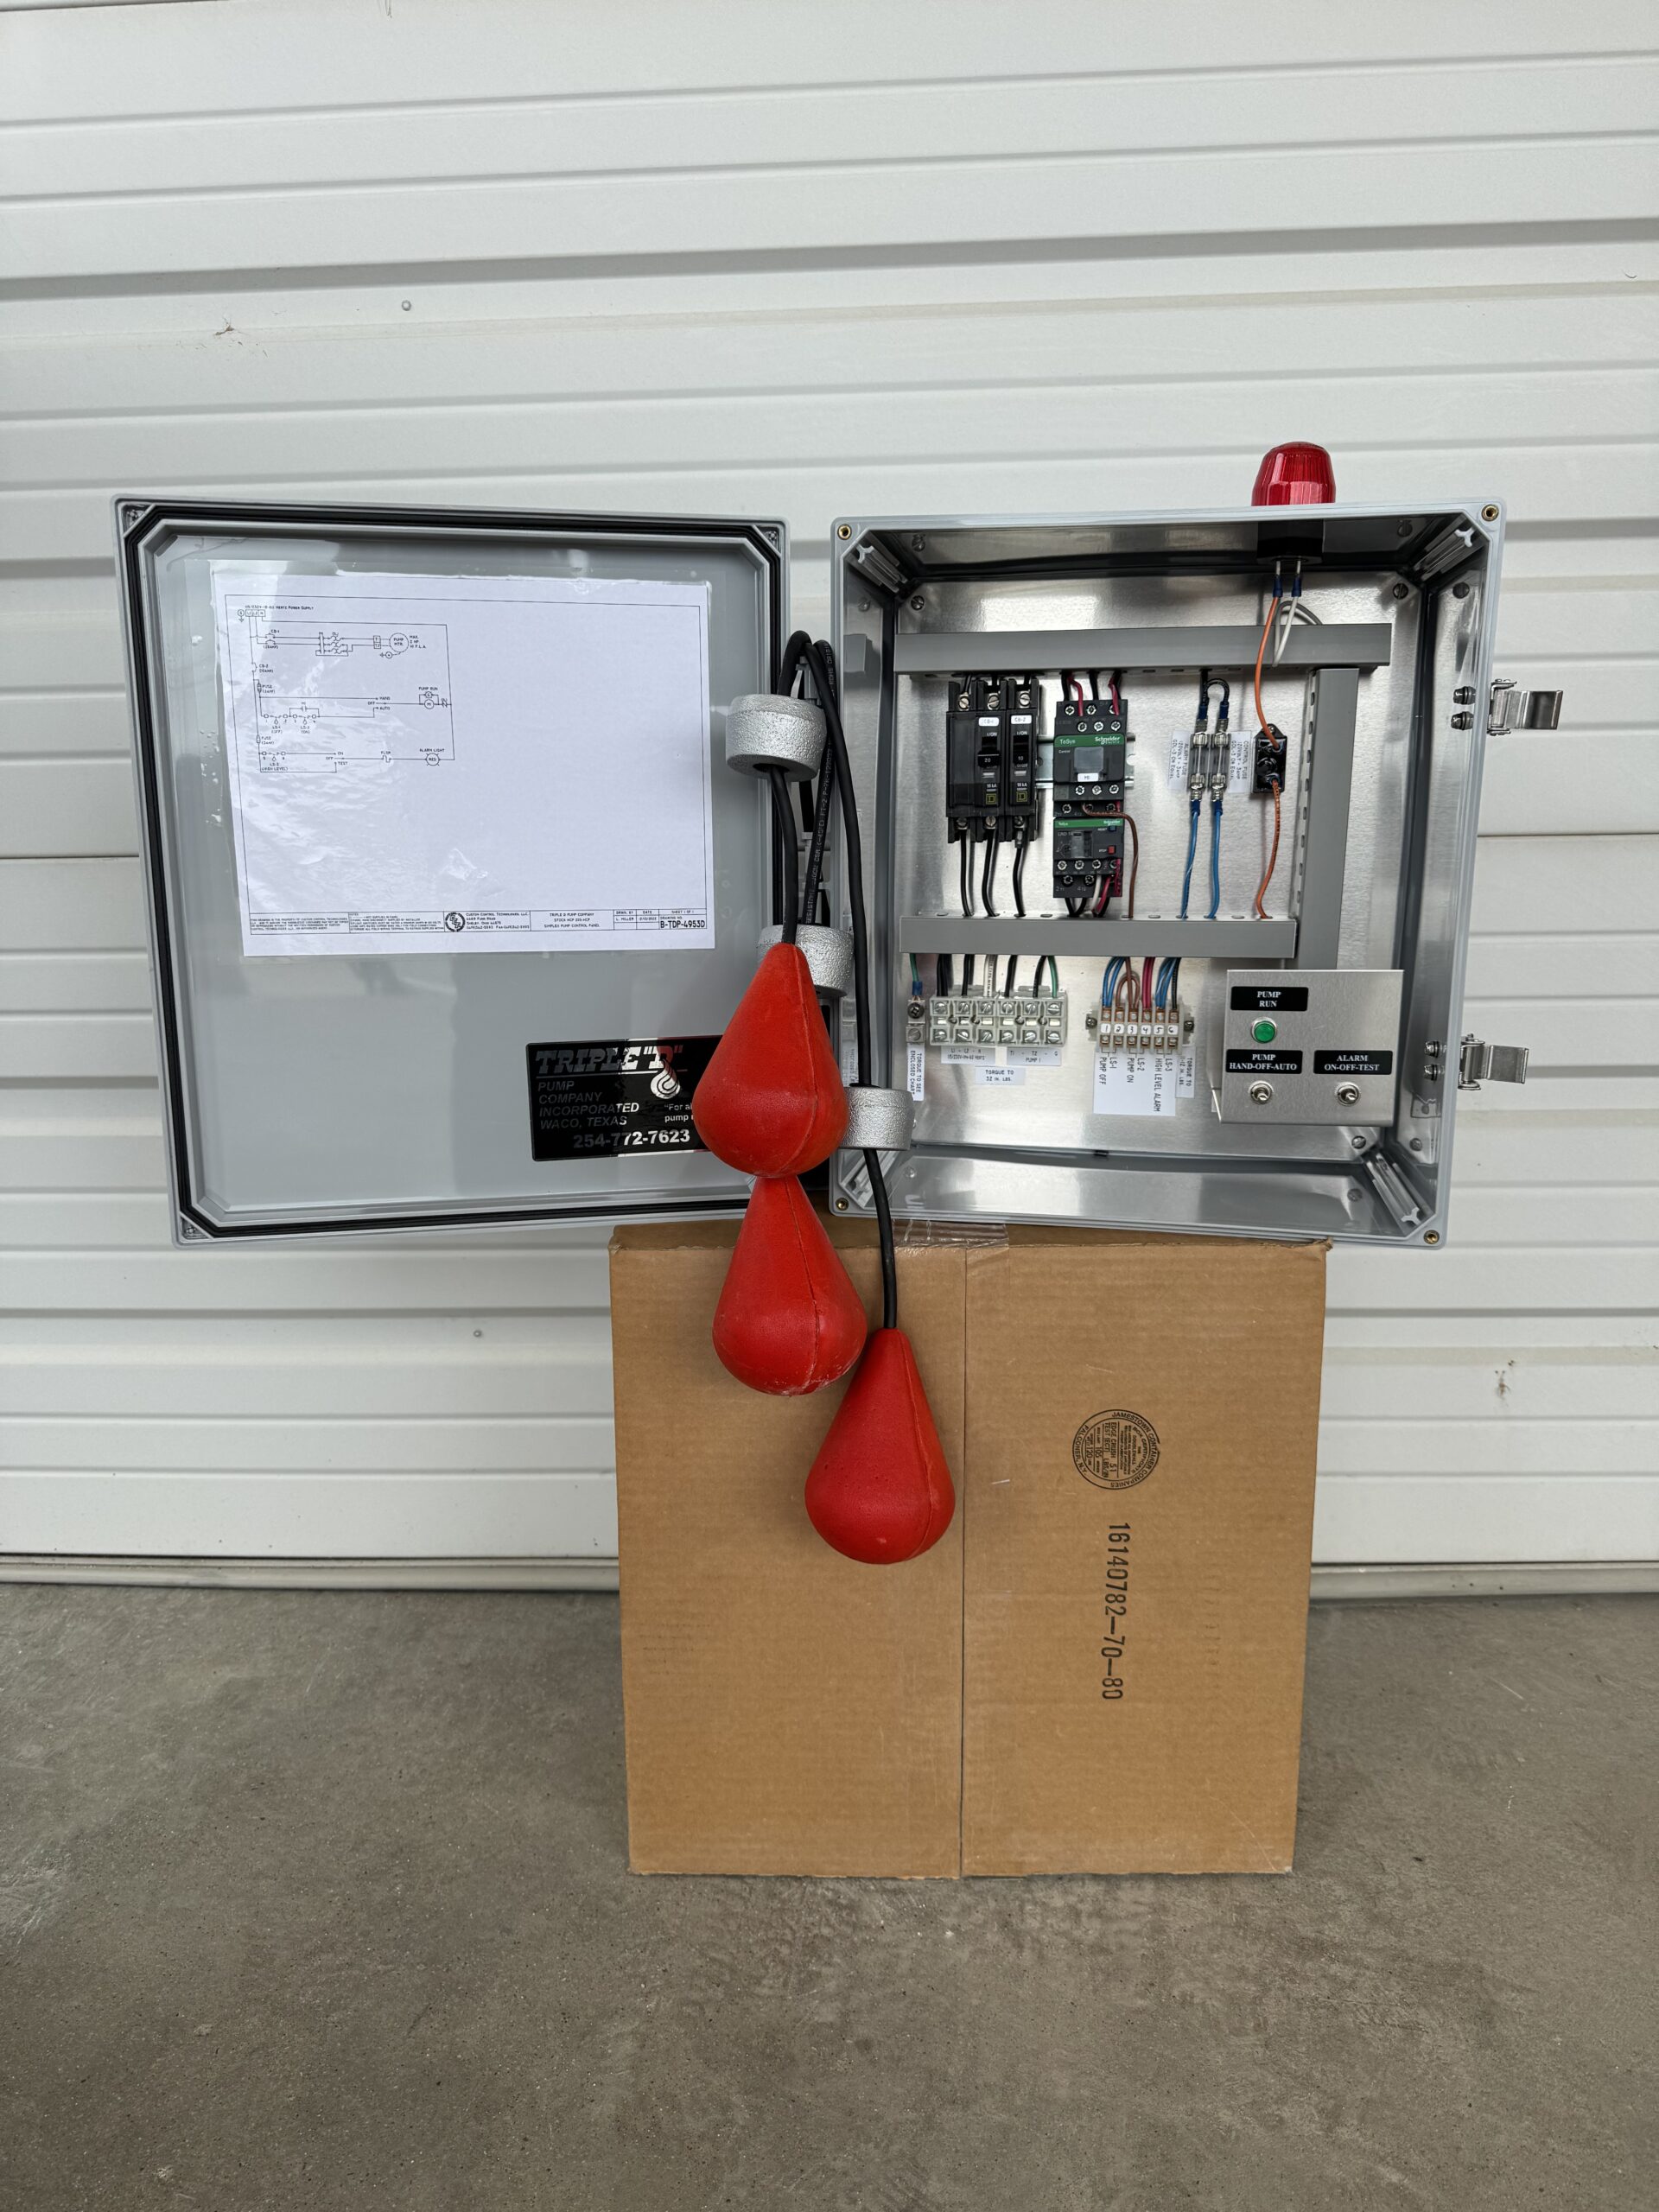
The Four Float Switch Setup
In a typical lift station, you’ll find four floats positioned vertically in the wet well:
- Stop Float (Lowest Float)
- Purpose: Tells the pump to shut off when the water reaches the normal low level.
- Placement: Just above the pump intake to avoid running the pump dry.
- Lead Pump Start Float
- Purpose: Activates the lead pump when water rises to this level.
- Placement: Several inches above the stop float to allow proper cycling.
- Lag Pump Start Float
- Purpose: Turns on the second pump (lag pump) if the lead pump can’t keep up.
- Placement: Above the lead start float, allowing time for the lead pump to run before the backup kicks in.
- High Water Alarm Float (Top Float)
- Purpose: Triggers an alarm when the water reaches a potentially dangerous level.
- Placement: Usually installed above the lag start float—but this can be set to the owner’s preference.
- Some owners place it above the lag float for a last-resort warning before overflow with less chance of a nuisance alarm.
- Others install it at the same height as the lag float to allow more time for response but have a greater chance for a nuisance alarm.
- The lower the alarm float, the more warning time you’ll have—it’s all based on your operational preference and site conditions.
How to Set the Floats
- Step 1 – Measure the Wet Well
Know the depth of your wet well and pump intake height. This determines where your stop float should be set. - Step 2 – Install the Stop Float
Place it above the pump’s minimum submergence level to prevent cavitation and dry running. - Step 3 – Set the Lead Start Float
Install it several inches (or a foot, depending on wet well size) above the stop float to ensure the pump runs long enough for efficient cycles. - Step 4 – Position the Lag Start Float
Place it higher than the lead start float to give the lead pump time to handle the flow before the lag pump starts. - Step 5 – Install the High Water Alarm Float
Decide whether you want it at the same height as, or above, the lag start float. Lower placement = more warning time, higher placement = less chance of nuisance alarms.
Tips for Reliable Float Operation
- Secure Cables Properly: Loose cables can tangle and cause false readings.
- Test Each Float: Fill the wet well and manually verify that each float activates correctly.
- Regular Maintenance: Check for buildup, grease, or debris that could cause floats to stick.
- Consider Redundancy: Some critical stations use backup sensors like pressure transducers in addition to floats.
Need Help Setting Floats?
At Triple D Pump, we’ve set up thousands of float systems in lift stations across Texas. Whether you’re installing a new station or troubleshooting an existing one, our technicians can set, test, and fine-tune your float arrangement for maximum reliability.
Call us today for a free quote or to schedule service—because in wastewater pumping, the right float settings make all the difference.
Looking for a complete lift station solution?
Don’t stop at just float settings—Triple D Pump can provide a complete, ready-to-install lift station custom-built for your site. Request a quote now to get started.